
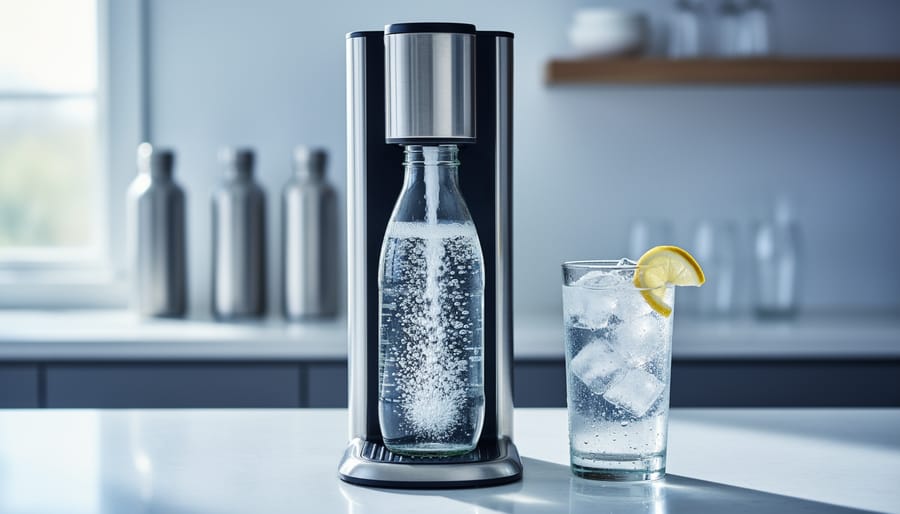
You can make sparkling water at home by forcing carbon dioxide gas into chilled, still water under pressure using either a home carbonation machine or a DIY soda siphon setup. The process takes about 30 seconds with a consumer device and costs roughly 25 cents per liter, compared to $1.50 or more for store-bought bottles.
I started carbonating my own water three years ago after calculating how much I was spending on La Croix for both drinking and cocktail mixing. What began as a cost-cutting measure transformed my home bar entirely. Fresh carbonation delivers a sharper, more aggressive fizz than anything you’ll find on a shelf, and that difference becomes especially noticeable in highballs and spritzes where the bubbles carry the drink.
The science here is straightforward: cold water absorbs CO2 more efficiently than warm water, and pressure forces the gas into solution. When you release that pressure by opening a bottle or dispensing from a tap, the dissolved gas comes out of solution as those tiny bubbles we’re after. This is the same principle commercial bottlers use, just scaled down to countertop size.
Home carbonation gives you complete control over bubble intensity, something cocktail enthusiasts particularly appreciate. A gentle fizz works beautifully in a French 75, while an aggressive charge suits a whiskey highball. You’ll also eliminate plastic waste, reclaim pantry space, and never face that 9 PM realization that you’re out of soda water mid-party. The equipment pays for itself within three to six months for most households, faster if you’re mixing drinks regularly.
Why Make Your Own Sparkling Water
Making your own sparkling water transforms a mundane grocery expense into an empowering kitchen skill. The numbers alone tell a compelling story: at roughly 8 cents per gallon with a basic carbonator cap setup, you’ll spend a fraction of what commercial sparkling water costs at the store. That $15 CO2 canister carbonates around 60 liters, meaning you’ll recoup your initial investment quickly if you’re currently buying those pricey bottles of Perrier or San Pellegrino every week.
The customization factor matters more than most people realize, especially if you’re serious about cocktails. Store-bought sparkling water comes with a fixed carbonation level that rarely matches what a specific drink needs. A delicate gin fizz benefits from gentle effervescence, while a robust highball demands aggressive bubbles. With your own setup, you control the PSI and carbonation time to achieve exactly what each recipe requires. I discovered this freedom accidentally when making Tom Collins one evening and realized I could dial the fizz down for a softer mouthfeel that let the lemon and gin shine without overwhelming the palate.
Beyond your wallet and your drinks, there’s genuine environmental relief in cutting out the single-use bottle habit. No more recycling bins overflowing with plastic containers or lugging heavy cases from the car. You carbonate the same reusable bottles again and again.
The satisfaction piece shouldn’t be dismissed either. There’s something deeply rewarding about creating your own carbonated beverages, whether it’s plain sparkling water for hydration or a carbonated tea base for experimental cocktails. You’re not just pressing a button on a store shelf anymore.
What You’ll Need to Get Started
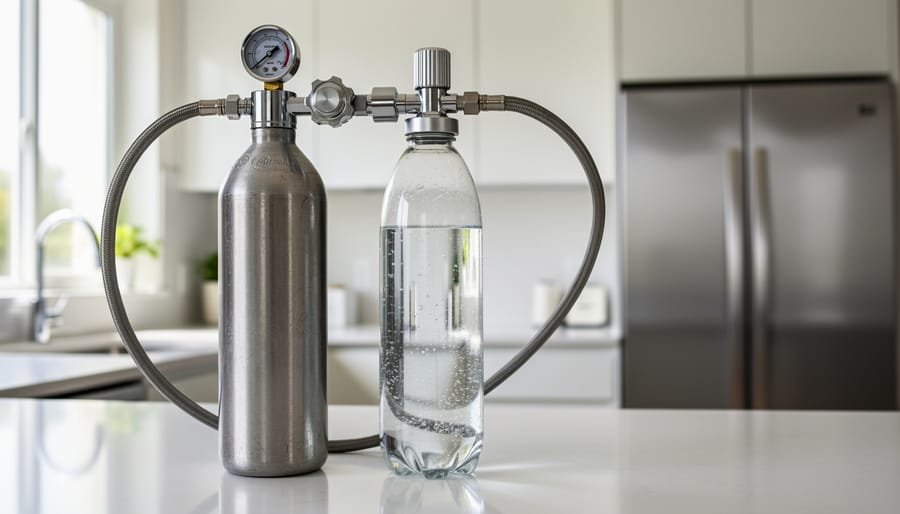
The beauty of DIY carbonation lies in its simplicity. You don’t need a specialized machine or a complicated setup to start making your own sparkling water. The core system requires just a handful of components, most of which you can pick up for a reasonable investment that pays for itself within weeks.
Here’s what you’ll need to build your home carbonation station:
- CO2 tank and regulator, Your carbonation source, which pressurizes the water with carbon dioxide bubbles
- Carbonator cap, The magic connector that attaches to standard plastic bottles and links them to your CO2 system
- One- or two-liter plastic bottles, Reusable containers that hold your water during carbonation
- CO2 tubing, Food-grade hose that connects the regulator to the carbonator cap
- Adjustable wrench, For securing gas connections and preventing leaks
The CO2 tank is your workhorse. A standard canister runs about $15 and carbonates around 60 liters of water, which works out to that legendary 8-cent-per-gallon cost. You’ll find these tanks at homebrew supply shops, welding supply stores, or through SodaStream’s refill program. The regulator attaches to the tank and gives you precise control over pressure, letting you dial in exactly how fizzy you want your water.
The carbonator cap is surprisingly affordable, usually under $20, and it transforms any standard soda bottle into a carbonation vessel. It screws onto the bottle opening and features a gas inlet that connects to your CO2 line. When pressurized, it forces carbon dioxide into the liquid below.
For bottles, stick with sturdy one- or two-liter plastic bottles designed for carbonated beverages. These can handle the pressure safely when you’ve screwed the cap on fairly tight. Never use glass or containers not rated for pressure.
If you’re feeling ambitious and want to carbonate larger quantities, a DIY kegerator setup lets you keep a full keg of sparkling water on tap. This involves a mini-fridge, keg, tap system, and the same CO2 tank setup. It’s overkill for most home bartenders, but it’s a conversation starter if you entertain frequently or run through sparkling water like I do during summer cocktail season.
Understanding CO2 Sources and Costs
The upfront investment in CO2 is surprisingly modest, and that’s where the real savings kick in. A standard-size CO2 canister runs about $15 and carbonates roughly 60 liters of water. Do the math: that breaks down to 25 cents per liter, or just 8 cents per gallon when you’re using an inexpensive carbonator cap setup with a plastic bottle. Compare that to grocery-store sparkling water at $1 to $2 per liter, and you’re looking at savings that pay for your equipment within weeks if you’re a regular fizz drinker.
CO2 tanks come in various sizes, from small paintball canisters to five- or ten-pound cylinders. Larger tanks mean fewer refills and better value per ounce of CO2, but they also require more storage space behind your home bar. I started with a five-pound tank, which lasted months of daily carbonation and fit neatly under my counter.
Refilling is straightforward. SodaStream sells refill and spare CO2 cylinders through retail partners and exchange programs, which is convenient if you already own their system. For standard tanks, sporting goods stores, welding supply shops, and homebrew retailers all handle CO2 refills, often for less than buying new canisters. Some will exchange your empty tank on the spot, others refill while you wait.
The economics tilt heavily toward DIY. A single case of bottled sparkling water costs what you’d spend carbonating 50 to 60 liters at home. If you’re making cocktails several nights a week or just prefer fizzy water throughout the day, that’s money back in your pocket every month, plus complete control over carbonation strength for whatever you’re mixing.
Safety Guidelines Before You Begin
Before you start carbonating, take a moment to understand the pressure you’ll be working with. CO2 tanks deliver serious force, and treating the process casually can lead to messy accidents or worse. Setting your regulator to around 40 PSI for water is a good starting point, but the real key is increasing pressure gradually rather than blasting your bottle all at once. A slow, controlled approach gives the CO2 time to dissolve properly and prevents dangerous over-pressurization.
Make sure your carbonator cap is screwed on fairly tight before connecting it to the CO2 line. A loose cap can pop off under pressure, sending a geyser of water across your kitchen and potentially injuring you. Check that your one- or two-liter bottle is in good condition without cracks, deep scratches, or stress marks. Reusing the same bottle indefinitely isn’t wise, plastic weakens with repeated pressurization cycles, so inspect bottles regularly and replace them when they show wear.
Work in a well-ventilated space, especially if you’re new to handling CO2 tanks. While carbon dioxide isn’t toxic in small amounts, a large leak in a confined area can displace oxygen and cause dizziness or worse. Before each carbonation session, check all your connections for leaks by listening for hissing sounds or applying soapy water to fittings and watching for bubbles. I learned this the hard way after wasting half a canister through a loose regulator connection, now I check every time without fail.
Step-by-Step Carbonation Process
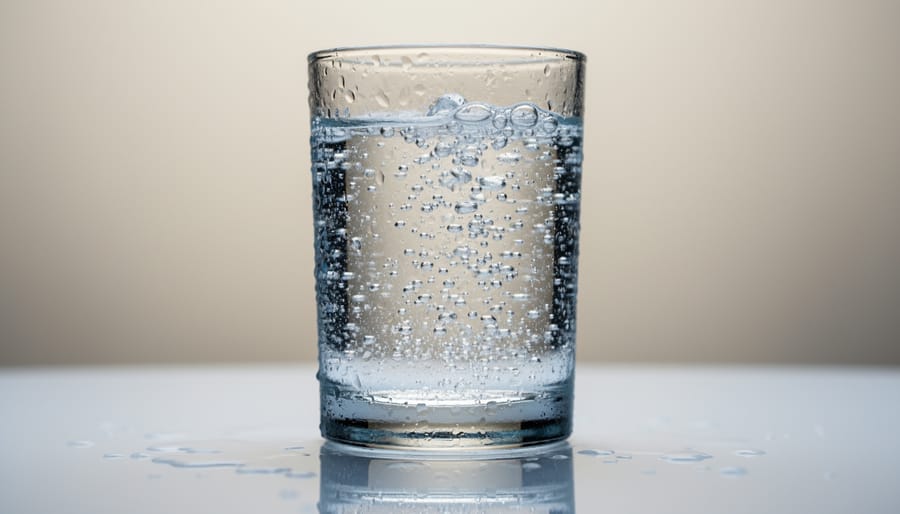
Start with water straight from the fridge. Cold water holds carbonation far better than room temperature liquid, it’s one of those small details that makes a real difference in your final result. Fill your one- or two-liter plastic bottle to about an inch below the rim, leaving headspace for the CO2 to work its magic. If you’ve just run the tap or the water’s been sitting out, pop the bottle in the fridge for 30 minutes first.
Once your water’s properly chilled, you’re ready to carbonate. The process follows a straightforward sequence, but precision matters when you’re working with pressurized gas:
- Screw the carbonator cap onto your filled bottle fairly tight, firm enough to create a seal, but you don’t need to overtighten it.
- Connect the carbonator cap’s ball-lock fitting to your CO2 tank’s gas line. You’ll hear a small hiss as the connection locks into place.
- Turn on your CO2 tank by opening the main valve on top, then slowly open the regulator valve to allow gas flow.
- Adjust your regulator’s outflow to your target PSI, 40 PSI works well for standard sparkling water, though you can dial this up or down based on preference.
- Open the regulator valve gradually and watch the pressure gauge climb. Resist the urge to rush this step; adding CO2 too quickly creates excessive foaming and wastes gas.
- Once the gauge reaches your target PSI and holds steady for about 30 seconds, close the regulator valve and turn off the CO2 tank.
- Carefully disconnect the ball-lock fitting from the carbonator cap, there’ll be a satisfying release of pressure, then unscrew the cap and give your water a quick taste test.
The fizz level you’re after depends entirely on what you’re making. For delicate cocktails like a French 75 or Aperol Spritz, aim for 35 PSI to create gentle effervescence that won’t overpower the other ingredients. Standard highballs and Tom Collins variations shine at 40 PSI, delivering that classic sparkling water bite. If you’re carbonating water for a Paloma or want aggressive bubbles that really punch through citrus and spirits, push it to 45 PSI.
I learned this the hard way after flat-out ruining a batch of gin fizzes with over-carbonated water that turned the drinks into foam volcanoes. Now I keep three bottles on rotation at different carbonation levels, clearly marked with tape. It’s transformed how I build drinks at home, no more guessing whether the bubbles will complement or compete with the cocktail.
If your first attempt tastes flat, don’t dump it. Just reconnect the cap, add another 5 PSI, and give it 15 more seconds of carbonation time. The beauty of this setup is you can always add more fizz, but you can’t take it away.
Testing Your Sparkling Water and Adjusting Carbonation
The moment you disconnect the carbonator cap, you’ll hear that satisfying hiss, the signature sound of success. Unscrew the cap slowly and listen for a strong, steady release of pressure. A weak or silent release usually means you need more carbonation time or higher PSI on your next attempt.
Pour a small amount into a glass and watch the bubble action. Aggressive, champagne-like fizz indicates high carbonation, perfect for drinks like Captain and Ginger or a Virgin Mary where you want that sharp, effervescent bite. Gentle, fine bubbles suit delicate applications like a Mojito mocktail or even a tomato lassi where aggressive carbonation would overpower subtle flavors.
Taste it. The water should have a crisp, bright quality without being harsh or acidic. If it’s flat, increase your PSI by 5 to 10 units next time or shake the bottle gently during carbonation to help CO2 dissolve faster. Over-carbonated water tastes sharp and almost biting, dial back the pressure or reduce carbonation time.
Keep notes on your batches. I started logging PSI settings and results for different drinks, and now I can dial in perfect fizz levels instinctively. A Negroni topped with lightly carbonated water is a revelation compared to the over-fizzy mess you get from commercial sparkling water.
Using Sparkling Water in Your Home Bar
Once you’re churning out fresh sparkling water for pennies per gallon, your home bar transforms completely. I still remember the night I served Tom Collins cocktails to friends using water I’d carbonated that afternoon, the bubbles were so aggressive and lively that every sip felt like champagne. One guest asked if I’d switched to premium tonic. I hadn’t. I’d just dialed in the perfect fizz.
Fresh sparkling water elevates classic cocktails that depend on effervescence. A Mojito gets that proper lift when you top it with water carbonated to your preferred level rather than whatever flat supermarket stuff you grabbed last week. Palomas become brighter, more refreshing. The difference is subtle but unmistakable once you taste them side by side.
The real advantage is customization. Some drinks need gentle, fine bubbles that won’t overpower delicate flavors. Others, highballs, spritzes, benefit from assertive carbonation that cuts through citrus and spirits. With your own setup, you adjust PSI on the fly. Carbonate a batch at 35 PSI for softer cocktails, another at 45 for aggressive fizz.
Beyond water, experiment with carbonating fresh fruit juices or cooled tea. Sparkling grapefruit juice makes a killer base for brunch cocktails. Carbonated green tea adds unexpected texture to gin drinks. Start with small batches to avoid waste, but don’t be afraid to push boundaries. Home carbonation isn’t just about saving money, it’s about controlling every element of the drinks you craft.
Common Questions About Home Carbonation
How long does homemade sparkling water stay carbonated?
In a sealed bottle kept cold, your homemade sparkling water maintains its fizz for 3-5 days. Once opened, drink it within 24 hours for the best carbonation, since CO2 escapes each time you break the seal.
Can you carbonate liquids other than water?
Yes, but stick to sugar-free liquids like cold brew coffee, tea, or fruit juices without pulp. Sugary or pulpy drinks can clog your equipment and create explosive messes when pressurized.
How often do you need to refill CO2?
A standard CO2 canister costs roughly $15 and carbonates around 60 liters of water. For most home bartenders making a few bottles weekly, that means refilling every 2-3 months.
What’s the difference between a carbonator cap system and a SodaStream?
A carbonator cap with a CO2 tank costs 8 cents per gallon and offers precise PSI control for cocktail work, while SodaStream machines are more convenient but pricier per liter and less adjustable. The cap system wins for serious drink makers; SodaStream suits casual users.
Is it safe to reuse plastic bottles?
One- or two-liter soda bottles designed for pressure can be reused safely for several months, but inspect them before each use for cracks, cloudiness, or warping. Replace any bottle showing wear to avoid rupture during carbonation.
These questions pop up constantly when I talk carbonation with fellow cocktail enthusiasts, and the answers matter for both safety and results. The bottle question especially hits home after I watched a friend’s worn bottle bulge alarmingly at 40 PSI. Now I rotate fresh bottles every few months and keep spares on hand.
The liquid question opens creative doors. I’ve carbonated everything from hibiscus tea for a sparkling shrub to cold brew for coffee cocktails, and each experiment taught me something new about pressure and flavor. Just remember that anything with sugar or particulates risks gumming up your carbonator cap, so strain thoroughly and carbonate at your own risk. Water remains the safest, most reliable choice, especially while you’re learning your equipment’s quirks and limits.
Making sparkling water at home is one of those rare wins where you save serious money, just 8 cents per gallon, while gaining creative control over every glass you pour. Once you’ve got your carbonator cap, CO2 tank, and a few plastic bottles, you’re equipped to carbonate anything from pure water for a refreshing spritz to custom mixers that’ll elevate your cocktails beyond what any store-bought bottle can offer.
I’ve found that experimenting with carbonation levels is half the fun. Dial it back to 30 PSI for a gentle fizz in a delicate gin cocktail, or crank it to 40 PSI for aggressive bubbles in a highball. The system is forgiving, and each batch teaches you something new about what works for your palate.
Don’t stop at plain water, either. Try carbonating chilled fruit juices, herbal teas, or even cocktail bases. The possibilities stretch as far as your imagination and your willingness to test. Share your carbonation experiments with fellow cocktail enthusiasts, there’s a whole community discovering what fizz can do. Now get out there, turn on that regulator, and make something spectacular.


